
MQTT整合
一、MQTT协议
MQTT(Message Queuing Telemetry Transport,消息队列遥测传输协议),是一种基于发布/订阅(publish/subscribe)模式的“轻量级”通讯协议,该协议构建于TCP/IP协议上。MQTT最大优点在于,用极少的代码和有限的带宽,为连接远程设备提供实时可靠的消息服务。作为一种低开销、低带宽占用的即时通讯协议,使其在物联网、小型设备、移动应用等方面有较广泛的应用。
要了解 MQTT 的工作原理,首先需要掌握以下几个概念:MQTT 客户端、MQTT Broker、发布-订阅模式、主题、QoS。
MQTT 客户端
任何运行 MQTT 客户端库的应用或设备都是 MQTT 客户端。例如,使用 MQTT 的即时通讯应用是客户端,使用 MQTT 上报数据的各种传感器是客户端,各种 MQTT 测试工具也是客户端。
MQTT Broker
MQTT Broker 是负责处理客户端请求的关键组件,包括建立连接、断开连接、订阅和取消订阅等操作,同时还负责消息的转发。一个高效强大的 MQTT Broker 能够轻松应对海量连接和百万级消息吞吐量,从而帮助物联网服务提供商专注于业务发展,快速构建可靠的 MQTT 应用。
发布-订阅模式
发布-订阅模式与客户端-服务器模式的不同之处在于,它将发送消息的客户端(发布者)和接收消息的客户端(订阅者)进行了解耦。发布者和订阅者之间无需建立直接连接,而是通过 MQTT Broker 来负责消息的路由和分发。
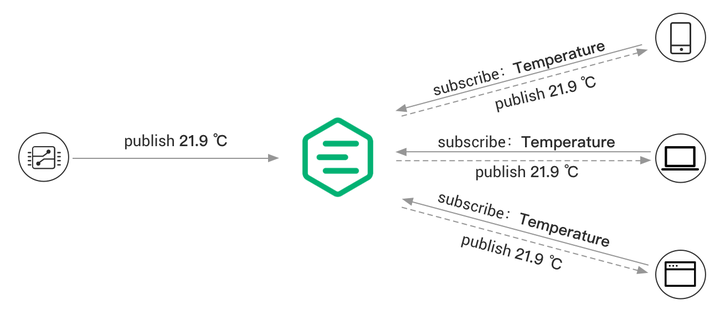
下图展示了 MQTT 发布/订阅过程。温度传感器作为客户端连接到 MQTT Broker,并通过发布操作将温度数据发布到一个特定主题(例如 Temperature)。MQTT Broker 接收到该消息后会负责将其转发给订阅了相应主题(Temperature)的订阅者客户端。
主题
MQTT 协议根据主题来转发消息。主题通过 / 来区分层级,类似于 URL 路径,例如:
chat/room/1

sensor/10/temperature

sensor/+/temperature
MQTT 主题支持以下两种通配符:+ 和 #。
+:表示单层通配符,例如a/+匹配a/x或a/y。#:表示多层通配符,例如a/#匹配a/x、a/b/c/d。
注意:通配符主题只能用于订阅,不能用于发布。
QoS
MQTT 提供了三种服务质量(QoS),在不同网络环境下保证消息的可靠性。
QoS 0:消息最多传送一次。如果当前客户端不可用,它将丢失这条消息。
QoS 1:消息至少传送一次。
QoS 2:消息只传送一次。
二、MQTT服务搭建
EMQ X 是一款完全开源,高可用低时延的百万级分布式物联网 MQTT 5.0 消息服务器。EMQX 支持多种协议,包括 MQTT (3.1、3.1.1 和 5.0)、HTTP、QUIC 和 WebSocket 等,保证各种网络环境和硬件设备的可访问性。EMQX 还提供了全面的 SSL/TLS 功能支持,比如双向认证以及多种身份验证机制,为物联网设备和应用程序提供可靠和高效的通信基础设施。
使用Docker可以快速搭建服务
运行以下命令获取 Docker 镜像:
docker pull emqx/emqx:5.2.1运行以下命令启动 Docker 容器。
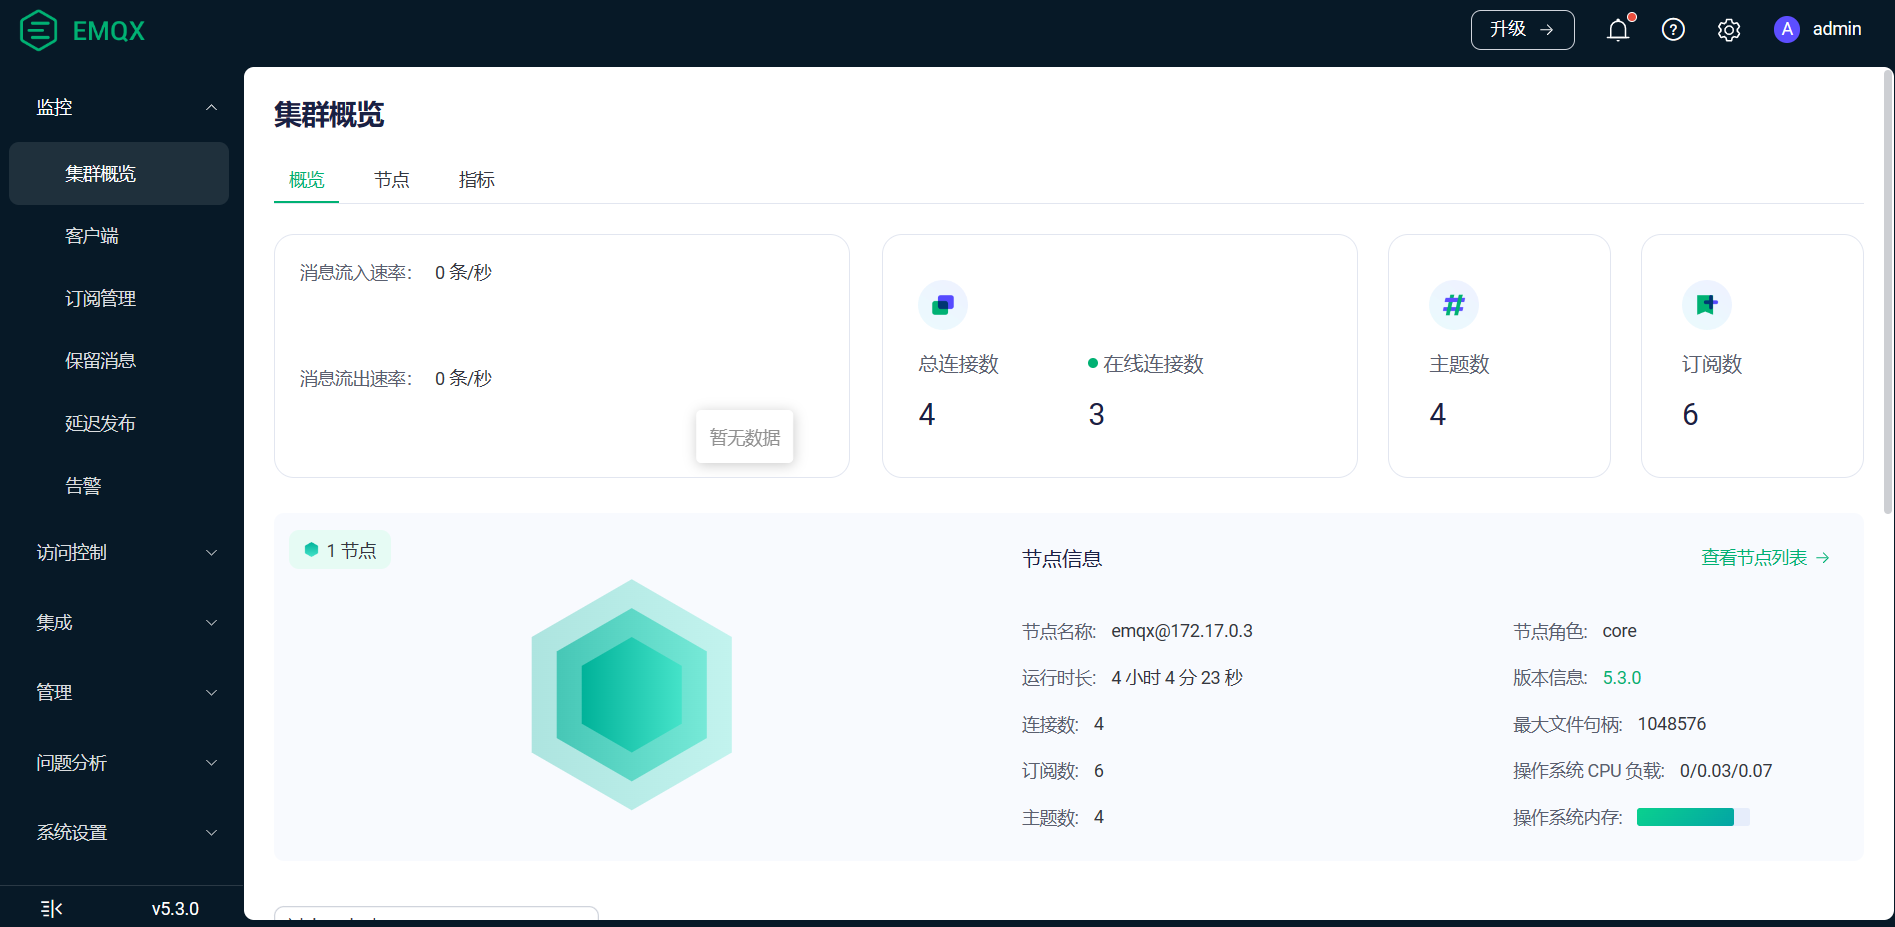
docker run -d --name emqx -p 1883:1883 -p 8083:8083 -p 8084:8084 -p 8883:8883 -p 18083:18083 emqx/emqx:5.2.1通过浏览器访问 http://localhost:18083/(localhost 可替换为您的实际 IP 地址)以访问 EMQX Dashboard 管理控制台,进行设备连接与相关指标监控管理。
默认用户名及密码:
admin
public
三、SpringBoot集成
maven依赖
<dependency>
    <groupId>org.springframework.integration</groupId>
    <artifactId>spring-integration-stream</artifactId>
</dependency>

<dependency>
    <groupId>org.springframework.integration</groupId>
    <artifactId>spring-integration-mqtt</artifactId>
</dependency>
application.yml文件配置
## MQTT配置
mqtt:
  #MQTT-用户名
  username: admin
  #MQTT-密码
  password: public
  #MQTT-服务器连接地址
  url: tcp://ip:1883
  #MQTT-连接服务器默认客户端ID
  clientId: client-test_server
  #MQTT-默认的消息推送主题,实际可在调用接口时指定
  defaultTopic: topic
  #MQTT-心跳
  keepAliveInterval: 60
  #MQTT-自动重连
  automaticReconnect: true
  #MQTT-清除session
  cleanSession: false
  #MQTT-超时连接
  completionTimeout: 30
订阅接受消息
@Slf4j
@Configuration
@IntegrationComponentScan
public class MqttSenderConfig {

    @Value("${mqtt.username}")
    private String username;
    @Value("${mqtt.password}")
    private String password;
    @Value("${mqtt.url}")
    private String url;
    @Value("${mqtt.clientId}")
    private String clientId;
    @Value("${mqtt.defaultTopic}")
    private String defaultTopic;
    @Value("${mqtt.keepAliveInterval}")
    private Integer keepAliveInterval;
    @Value("${mqtt.automaticReconnect}")
    private Boolean automaticReconnect;
    @Value("${mqtt.cleanSession}")
    private Boolean cleanSession;
    @Value("${mqtt.completionTimeout}")
    private Integer completionTimeout;


    /**
     * mqtt连接选项
     *
     * @return {@link MqttConnectOptions}
     */
    @Bean
    public MqttConnectOptions mqttConnectOptions() {
        MqttConnectOptions options = new MqttConnectOptions();
        options.setUserName(username);
        options.setPassword(password.toCharArray());
        options.setServerURIs(new String[]{url});
        options.setKeepAliveInterval(keepAliveInterval);
        options.setAutomaticReconnect(automaticReconnect);
        options.setCleanSession(cleanSession);
        options.setConnectionTimeout(completionTimeout);
        return options;
    }

    /**
     * mqtt-paho客户工厂
     *
     * @param mqttConnectOptions mqtt连接选项
     * @return {@link MqttPahoClientFactory}
     */
    @Bean
    public MqttPahoClientFactory mqttPahoClientFactory(MqttConnectOptions mqttConnectOptions) {
        DefaultMqttPahoClientFactory factory = new DefaultMqttPahoClientFactory();
        factory.setConnectionOptions(mqttConnectOptions);
        return factory;
    }

    // 接收通道1
    @Bean
    public MessageChannel mqttInputChannel() {
        return new DirectChannel();
    }

    //接受通道2
    @Bean
    public MessageChannel mqttInputChannelTmp() {
        return new DirectChannel();
    }

    // 配置client,监听topic
    @Bean
    public MessageProducer inbound(MqttPahoClientFactory mqttPahoClientFactory) {
        MqttPahoMessageDrivenChannelAdapter adapter = new MqttPahoMessageDrivenChannelAdapter(clientId + "-subscribe", mqttPahoClientFactory, "hello1", "topic1");
        // 此处设置的是毫秒 10000为十秒
        adapter.setCompletionTimeout(10000);
        adapter.setConverter(new DefaultPahoMessageConverter());
        adapter.setQos(1);
        adapter.setOutputChannel(mqttInputChannel());
        return adapter;
    }

    // 配置client2,监听topic
    @Bean
    public MessageProducer inboundTmp(MqttPahoClientFactory mqttPahoClientFactory) {
        MqttPahoMessageDrivenChannelAdapter adapter = new MqttPahoMessageDrivenChannelAdapter(clientId + "-subscribeTmp", mqttPahoClientFactory, "hello2", "topic2");
        // 此处设置的是毫秒 10000为十秒
        adapter.setCompletionTimeout(10000);
        adapter.setConverter(new DefaultPahoMessageConverter());
        adapter.setQos(1);
        adapter.setOutputChannel(mqttInputChannelTmp());
        return adapter;
    }

    // 通过通道1获取数据
    @Bean
    @ServiceActivator(inputChannel = "mqttInputChannel")
    public MessageHandler receiveHandler() {
        return message -> {
            String topic = message.getHeaders().get("mqtt_receivedTopic").toString();
            String mess = message.getPayload().toString();
            log.info("通道1监听收到来自:{}的消息:{}", topic, mess);
        };
    }

    // 通过通道2获取数据
    @Bean
    @ServiceActivator(inputChannel = "mqttInputChannelTmp")
    public MessageHandler receiveHandlerTmp() {
        return message -> {
            String topic = message.getHeaders().get("mqtt_receivedTopic").toString();
            String mess = message.getPayload().toString();
            log.info("通道2监听收到来自:{}的消息:{}", topic, mess);
        };
    }


    /************************************************************************************************************/

    // 推送通道
    @Bean
    public MessageChannel mqttOutputChannel() {
        return new DirectChannel();
    }

    @Bean
    @ServiceActivator(inputChannel = "mqttOutputChannel")
    public MessageHandler sendHandler(MqttPahoClientFactory mqttPahoClientFactory) {
        MqttPahoMessageHandler messageHandler = new MqttPahoMessageHandler(clientId + "-publish", mqttPahoClientFactory);
        messageHandler.setAsync(true);
        messageHandler.setDefaultQos(1);
        messageHandler.setDefaultTopic(defaultTopic);
        return messageHandler;
    }

}
效果
2023-10-12 17:01:58.089  INFO 22488 --- [erver-subscribe] c.e.mqtt.configuration.MqttSenderConfig  : 通道1监听收到来自:hello1的消息:{"msg": "hello"}
2023-10-12 17:01:59.502  INFO 22488 --- [erver-subscribe] c.e.mqtt.configuration.MqttSenderConfig  : 通道1监听收到来自:hello1的消息:{"msg": "hello"}
2023-10-12 17:02:00.358  INFO 22488 --- [erver-subscribe] c.e.mqtt.configuration.MqttSenderConfig  : 通道1监听收到来自:hello1的消息:{"msg": "hello"}
2023-10-12 17:02:03.755  INFO 22488 --- [er-subscribeTmp] c.e.mqtt.configuration.MqttSenderConfig  : 通道2监听收到来自:hello2的消息:{"msg": "hello"}
2023-10-12 17:02:04.922  INFO 22488 --- [er-subscribeTmp] c.e.mqtt.configuration.MqttSenderConfig  : 通道2监听收到来自:hello2的消息:{"msg": "hello"}
2023-10-12 17:02:05.705  INFO 22488 --- [er-subscribeTmp] c.e.mqtt.configuration.MqttSenderConfig  : 通道2监听收到来自:hello2的消息:{"msg": "hello"}
推送消息
@MessagingGateway(defaultRequestChannel = "mqttOutputChannel")
public interface MqttGateway {

    /**
     * 发送到mqtt
     *
     * @param data  数据
     * @param topic 话题
     */
    void sendToMqtt(String data, @Header(MqttHeaders.TOPIC) String topic);
}
/**
* 你好世界
*
* @return {@link String}
*/
@GetMapping("hello")
public String helloWorld() {
mqttUtil.sendToMqtt("helloworld", "hello1");
return "hello world";
}四、总结
发现一个更好用的工具参考。
lets-mica/mica-mqtt: 基于 java aio 实现,开源、简单、易用、低延迟、高性能百万级 Java mqtt client 组件和 Java mqtt broker 服务。 (github.com)